Developers & Practitioners
Google Cloud Billing allows Billing Account Administrators to configure the export of Google Cloud billing data to a BigQuery dataset for analysis and intercompany billback scenarios. Developers may choose to extract Google Cloud VMware Engine (GCVE) configuration and utilization data and apply internal cost and pricing data to create custom reports to support GCVE resource billback scenarios. Using VMware PowerCLI, a collection of modules for Windows PowerShell, data is extracted and loaded into Big Query. Once the data is loaded into Big Query, analysts may choose to create billing reports and dashboards using Looker or Google Sheets.
Exporting data from Google Cloud billing data into a BigQuery dataset is relatively straight-forward. However, exporting data from GCVE into BigQuery requires PowerShell scripting. The following blog details steps to extract data from GCVE and load it into BigQuery for reporting and analysis.
Initial Setup VMware PowerCLI Installation
Installing and configuring VMware PowerCLI is a relatively quick process, with the primary dependency being network connectivity between the host used to develop and run the PowerShell script and the GCVE Private Cloud.
-
[Option A] Provision a Google Compute Engine instance, for example Windows Server 2019, for use as a development server.
[Option B] Alternatively, use a Windows laptop with Powershell 3.0 or higher installed -
Launch the Powershell ISE as Administrator. Install and configure the VMware PowerCLI, any required dependencies and perform a connection test.
#Install VMware.PowerCLI moduleInstall-Module -Name VMware.PowerCLI#Test a connection to the vCenter Server of your Private CloudTest-NetConnection $server -port 443
Reference: https://www.powershellgallery.com/packages/VMware.PowerCLI/12.3.0.17860403
VMware PowerCLI Development
Next, develop a script to extract and load data into BigQuery. Note that this requires a developer to have permissions to create a BigQuery dataset, create tables and insert data. An example process including code samples follows.
1. Import the PowerCLI Module and connect to the GVCE cluster.
Import-Module VMware.PowerCLI -Verbose:$falseSet-PowerCLIConfiguration -confirm:$false
2. [Optional] If desired, a vCenter simulator docker container, nimmis/vcsim : vCenter and ESi API based simulator, may be useful for development purposes. For information on setting up a vCenter simulator, see the following link: https://www.altaro.com/vmware/powercli-scripting-vcsim/
3. Create a dataset to hold data tables in BigQuery. This dataset may hold multiple tables.
bq --location=us mk -d --default_table_expiration 3600 --description "GCVE HOST DATA" gcve_host_data
4. Create a list of vCenters you would like to collect data from.
#example list of vCenters.$vcenterlist = @('vcsa-01.us-west3.gve.goog''vcsa-02.us-west3.gve.goog''vcsa-03.us-west3.gve.goog')#Loop through the vCenter list, extract data and load into BQforeach ($v in $vcenterlist){#...1. Extract data & perform operations as required. Examples follow.#...2. Insert data into BigQuery. Examples follow.}
5. Create a file name variable.
#create a file name$fileName = "export-$($vcenter)-$($region)-hostname.json"
6. For a simple VM inventory, extract data using the Get-VM cmdlet. You may also choose to extract data using other cmdlets, for example, Get-VMHost and Get-DataStore. Review vSphere developer documentation for more information on available cmdlets along with specific examples.
#Connect to a Server and Extract all VM's including the following properties: CPU, RAM, Power State, Provisioned Space, Custom FieldsConnect-VIServer -Server $server -User $user -Password $password#Optionally, connect using credentials stored in GCP Secret Manager (best practice)$vcenter_u = (gcloud secrets versions access latest --secret="vcenter_u")$vcenter_p = (gcloud secrets versions access latest --secret="vcenter_p")$pwd = ConvertTo-SecureString $vcenter_p -AsPlainText -Force$cred = New-Object System.Management.Automation.PSCredential($vcenter_u,$pwd)Connect-VIServer -Server $server -Credential $cred#Extract data for all VM's including the specified fields$vmData = (Get-VM | Select-Object -Property Name, CustomFields, NumCPU, MemoryGB, ProvisionedSpaceGB, PowerState, VMHost)#example: esxi host info#$esxiHosts = (Get-VMHost | Select-Object -Property Name,CpuUsageMhz,CpuTotalMhz, MemoryUsageGB, MemoryTotalGB, PowerState, NumCpu)#example: datastore info#$datastores = (Get-Datastore | Select-Object -Property Name, CapacityGB, FreeSpaceGB)#Create additional metadata fields as required.$run_date = [datetime]::Now.ToUniversalTime().ToString("s")$run_id = New-Guid#Loop through the VMs and append metadataforeach ($vm in $vmData){#Add metadata$vm | Add-Member -Type NoteProperty -Name "run_id" -Value $run_id.ToString() -Force$vm | Add-Member -Type NoteProperty -Name "run_date" -Value $run_date -Force#Parse Custom Fields (if applicable), assuming that they are comma separated. This is useful when creating custom tags to identify a group of servers associated with an application or service. See the paragraph below on using custom tags for more information.$custom = $vm | Select -ExpandProperty "CustomFields"foreach ($co in $custom){if ($co.Key -eq "custom-tag") {$vm | Add-Member -Type NoteProperty -Name "custom-tag" -Value $co.Value.split(",")}}#Convert to Json$jsonline = $vm | ConvertTo-Json -Compress#Write content to the fileAdd-Content $fileName $jsonline}
7. View/Validate the json data as required.

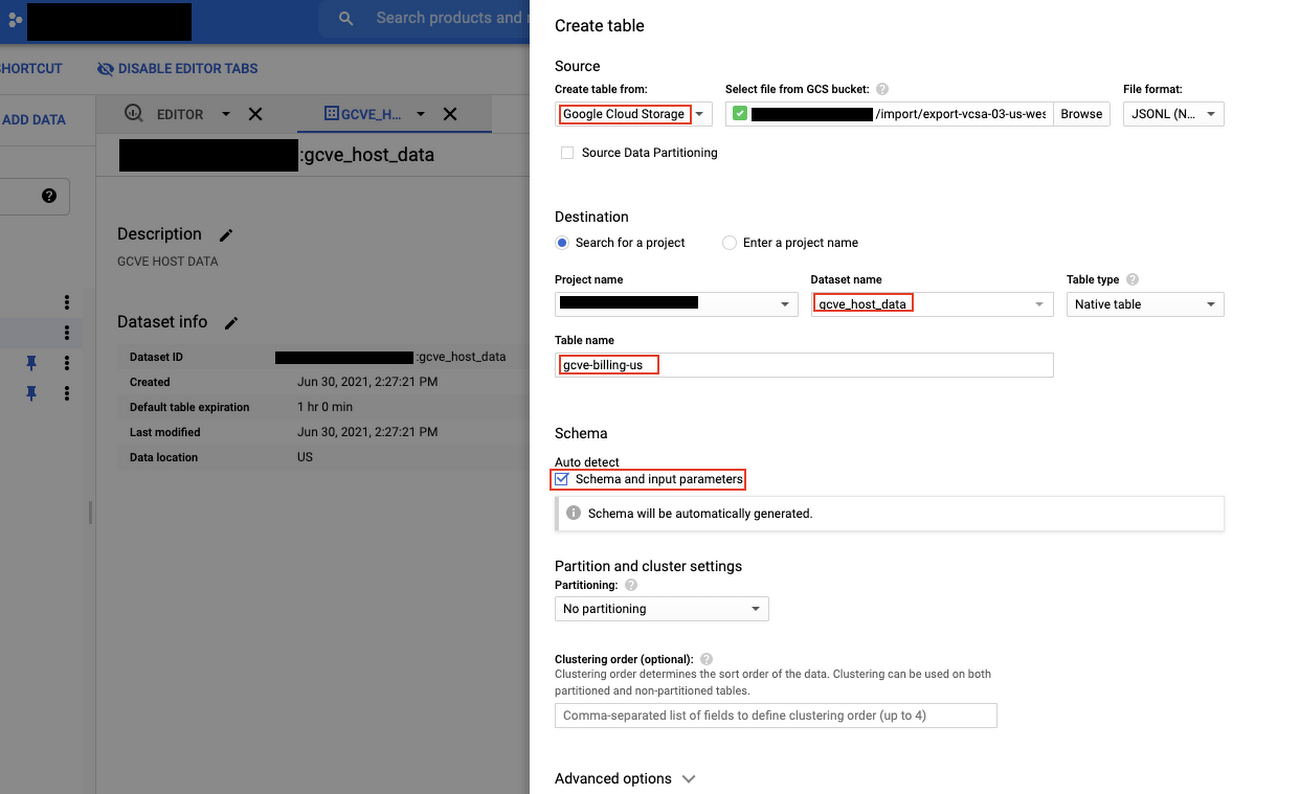
8. Create a table in BigQuery. Note that this only needs to be done once. In the example below the .json file was first loaded into a Cloud Storage bucket. The table was then created from the file in the bucket.

9. Load the file into Big Query.
#Powershell command to load file into BigQuerybq load --location us --noreplace --autodetect --source_format NEWLINE_DELIMITED_JSON gcve_host_data.gcve-billing-us $fileName
10. Disconnect from a server.
#DisconnectDisconnect-VIServer -Server $server -Force -confirm:$false
11. Consider scheduling the script you developed using Windows Task Scheduler, cron or another scheduling tool so that it runs on the required schedule.
12. Using the BigQuery UI or Google Data Studio, create views and queries referencing the staging tables to extract and transform data for reporting and analysis purposes. It’s a good idea to create any supporting tables in BigQuery to support cost analysis such as a date dimension table, pricing schedule table and other relevant lookup tables to support allocations and departmental bill back scenarios. Connect to Big Query using Looker to create reports and dashboards.
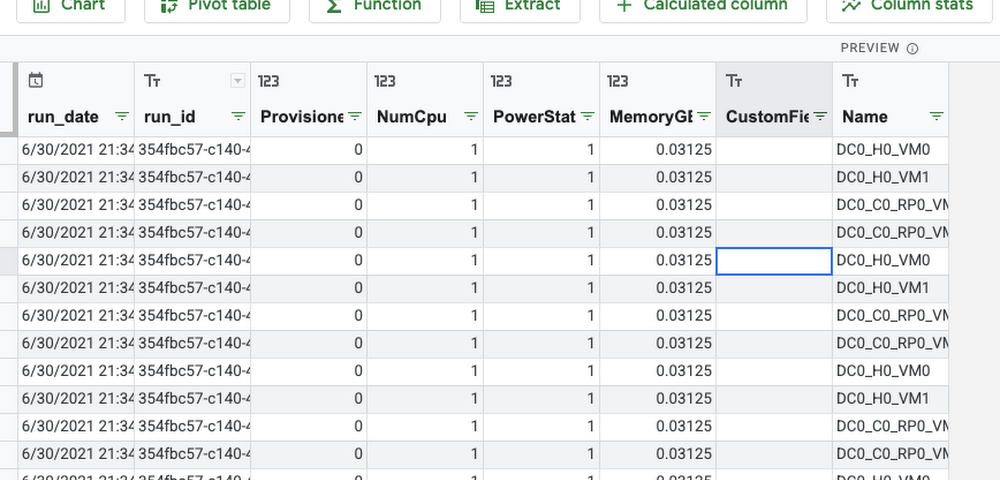
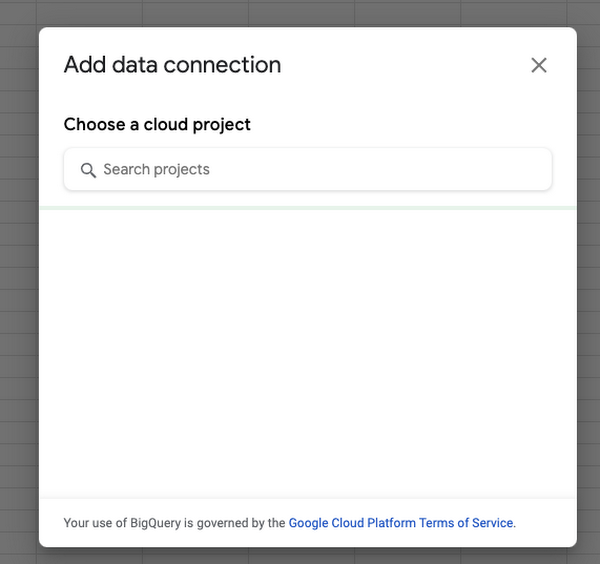
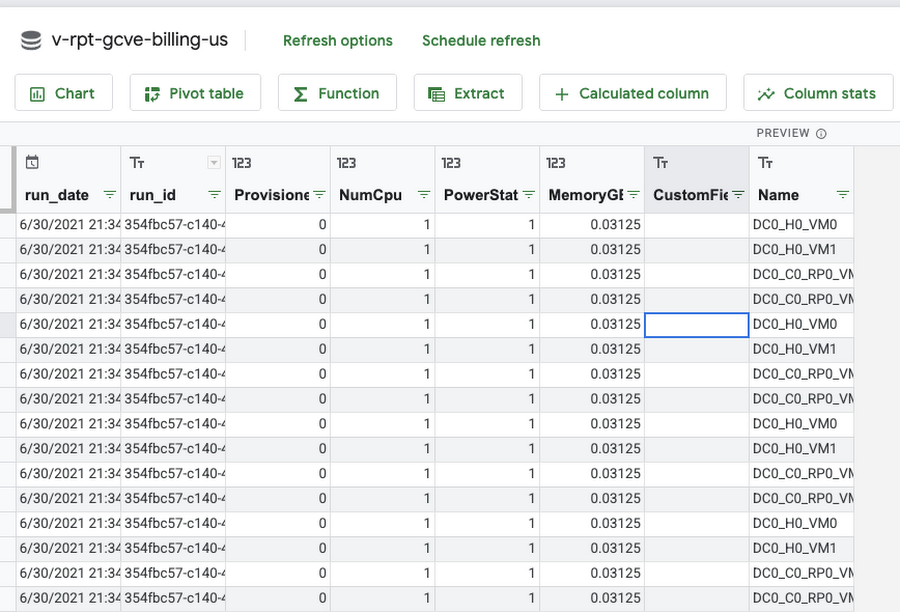
Example: Connect to BigQuery from Google Sheets and Import data.
Using Custom Tags
Custom tags allow a GCVE administrator to associate a VM with a specific service or application and are useful for bill back and cost allocation. For example, vm’s that have a custom tag populated with a service name (ex. x-callcenter) can be grouped together to calculate direct costs required to deliver a service. Jump boxes or shared vm’s may be tagged accordingly and grouped to support shared service and indirect cost allocations. Custom tags combined with key metrics such as provisioned, utilized and available capacity enable GCVE administrators to optimize infrastructure and support budgeting and accounting requirements.
Serverless Billing Exports scheduled with Cloud Scheduler
In addition to running powershell code as a scheduled task, you may choose to host your script in a container and enable script execution using a web service. One possible solution could look something like this:
-
Create a Docker File running ubuntu 18:04. Install Python3, Powershell 7 and VmWare Power CLI
-
Example requirements.txt
requests==2.25.1google-cloud-secret-manager==2.4.0google-cloud-storage==1.38.0flask==2.0.1gunicorn==20.1.0
Example Docker File:
FROM ubuntu:18.04RUN apt-get updateRUN apt-get install -y wget unzip apt-transport-https software-properties-common vim python3 python3-pipRUN wget -q https://packages.microsoft.com/config/ubuntu/16.04/packages-microsoft-prod.debRUN dpkg -i packages-microsoft-prod.debRUN apt-get updateRUN apt-get install -y powershellRUN wget https://vdc-download.vmware.com/vmwb-repository/dcr-public/8bf09c32-43c0-46d4-8816-92515c3b8228/15761272-b339-4da4-888a-4b8633f9a964/VMware-PowerCLI-11.3.0-13990089.zip -P /opt/microsoft/powershell/7/ModulesRUN unzip -d /opt/microsoft/powershell/7/Modules/ /opt/microsoft/powershell/7/Modules/VMware-PowerCLI-11.3.0-13990089.zip; exit 0COPY requirements.txt ./RUN pip3 install -r requirements.txt# Copy local code to the container image.ENV APP_HOME /appWORKDIR $APP_HOMECOPY . ./# Run the web service on container startup.# Use gunicorn webserver with one worker process and 8 threads.# For environments with multiple CPU cores, increase the number of workers# to be equal to the cores available.# Timeout is set to 0 to disable the timeouts of the workers to allow Cloud Run to handle instance scaling.CMD exec gunicorn --bind :8080 --workers 1 --threads 8--timeout 0 main:app
2. For your main.py script, use subprocess to run your powershell script. Push your container to Container Registry , deploy your container and schedule ELT using Cloud Scheduler.
import base64import datetimeimport osimport jsonimport requestsimport subprocessfrom copy import deepcopyfrom uuid import uuid4from flask import Flask, requestfrom google.cloud import secretmanager, storage#grab vCenter auth info from Secrets Managersecrets = secretmanager.SecretManagerServiceClient()vc_ip = secrets.access_secret_version(request={"name": os.getenv('VPC_IP')}).payload.data.decode("utf-8")vc_user = secrets.access_secret_version(request={"name": os.getenv('VPC_USER')}).payload.data.decode("utf-8")vc_pw = secrets.access_secret_version(request={"name": os.getenv('VPC_PWD')}).payload.data.decode("utf-8")command = "/usr/bin/pwsh"psfile = "/app/powercli.ps1"data = subprocess.run([command, psfile, '-server', vc_ip, '-user', vc_user, '-password', vc_pw])

