Developers & Practitioners
TL;DR – Budgets are ideal for visibility into your costs but they can become tedious to manually update. Using the Billing Budgets API you can automate updates and changes with your custom business logic!

We’ve talked a lot about what budgets are and how to set them up. Once you’re working with a larger company or lots of projects, it can become useful to have multiple budgets that line up to things like lines of business or certain teams. Unfortunately, manually going in and updating budgets can be a tedious task especially if you’re in a rapidly changing environment. Thankfully, the Billing Budgets API can help!
Automation through APIs and Service Accounts
There’s plenty of ways you can automate Google Cloud project creation, such as Terraform or using the API directly. For this post, we’ll focus on the steps for interacting with the Billing Budget API so you can automate budgets regardless of which tool you’re using. We’ll also be using Python but the documentation covers more ways/languages to use the API.
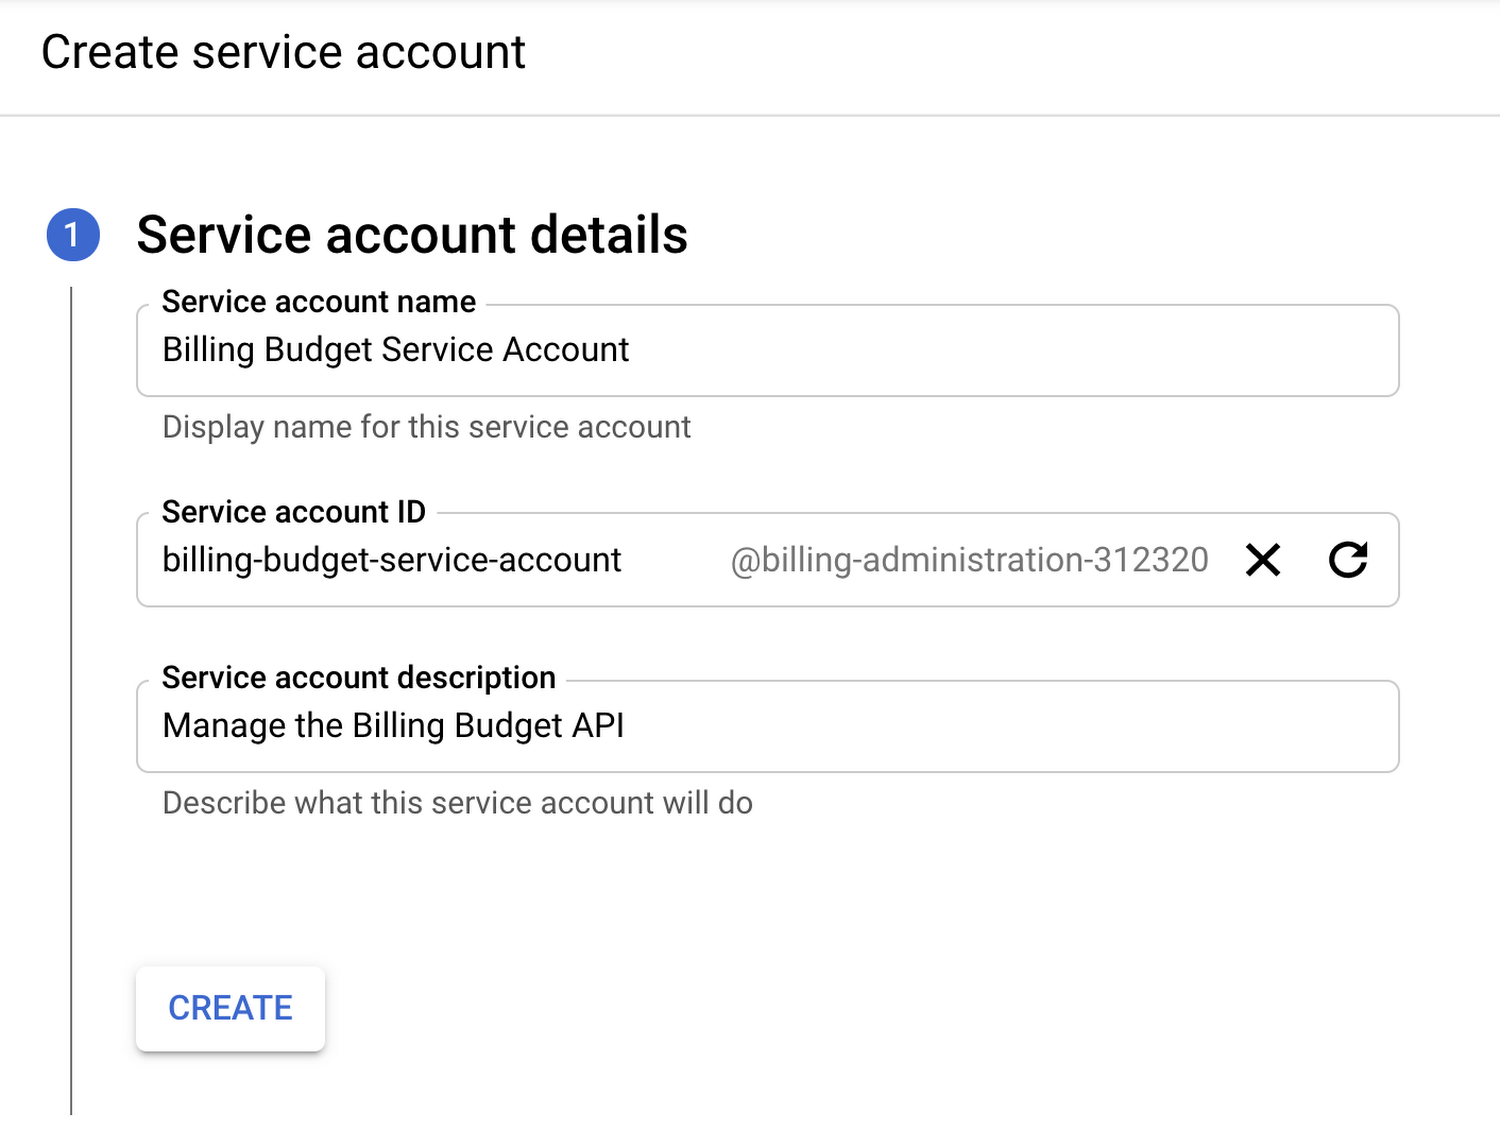
The first thing we’ll need is an identity with which to manage these budgets! To create a Service Account, you’ll want to head to the Service Accounts page under IAM & Admin.

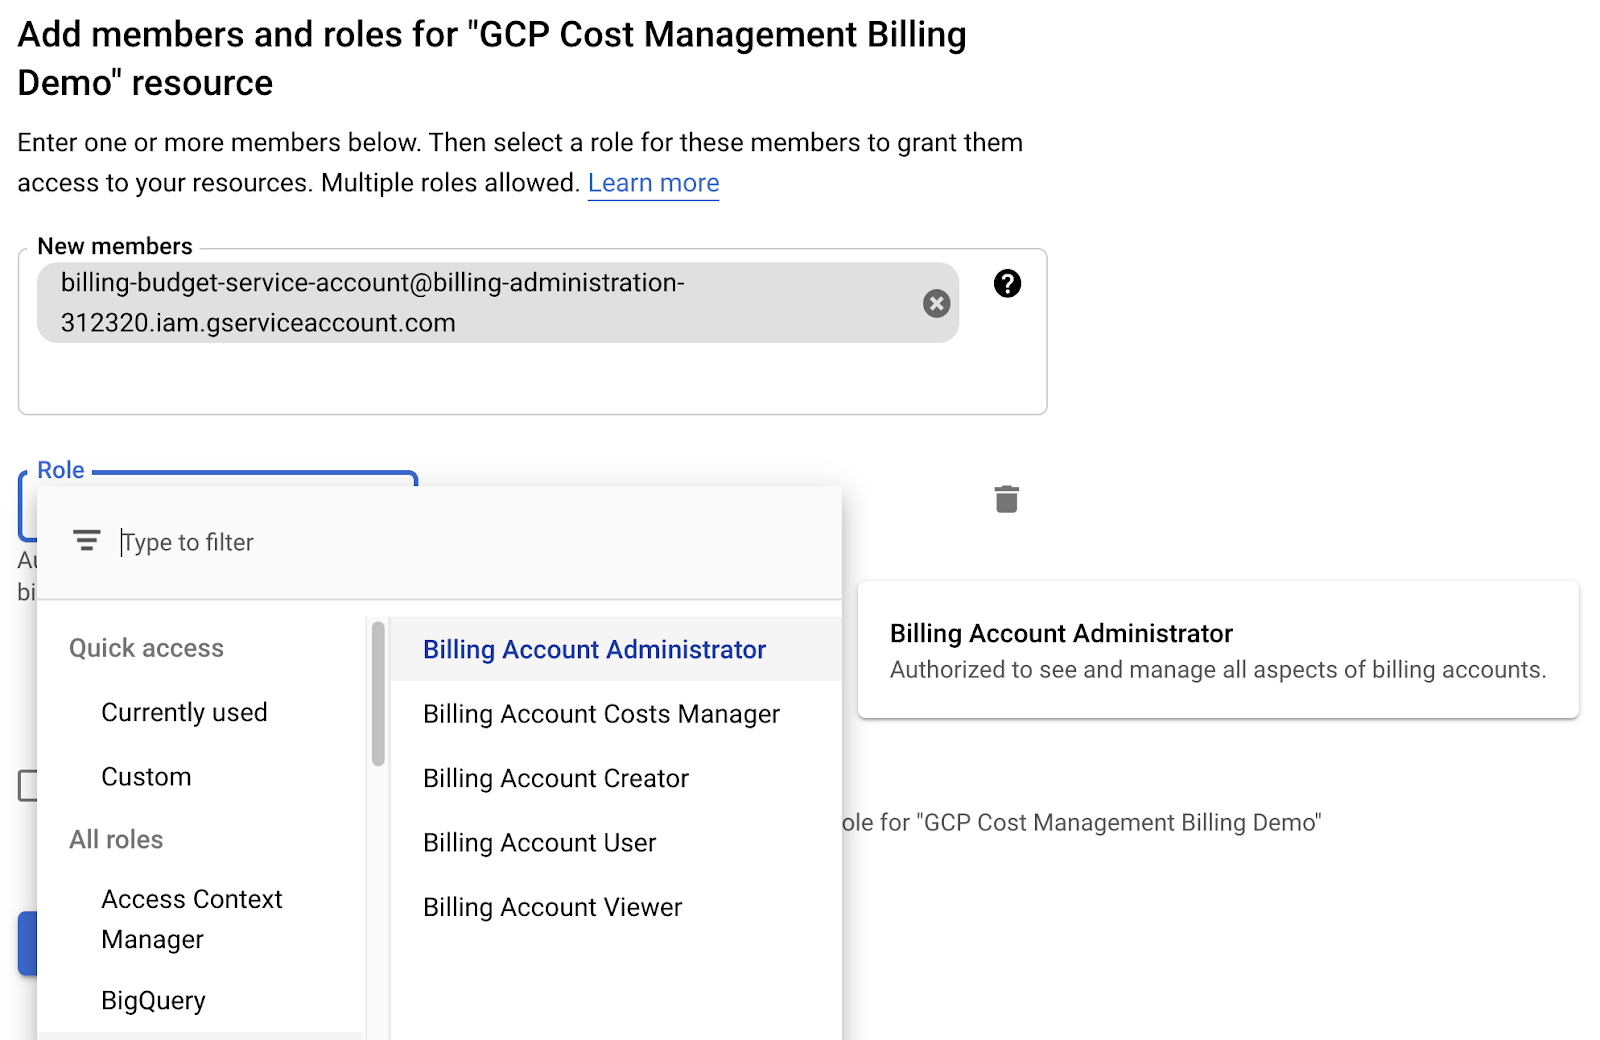
If you need more information about Service Accounts, check out the documentation here. We’re keeping things pretty simple by creating a simple Service Account and JSON key (don’t forget to download this!) to authenticate with it. We’ll also need to do one more thing and give the Service Account access to manage budgets on the billing account itself. You can choose Billing from the menu in the top left, choose which billing account you want to work with, and then choose Account management from the left navigation.
We’ll grant this Service Account administrator access so it can manage all budgets. Of course, if this were a production account and environment, it would be worth setting up a custom role to ensure that just in case the Service Account key was compromised, the amount of damage would be limited. Principle of least privilege and all that!

We’ll also have to make sure the API is enabled, which you can do from the Cloud Billing Budget API page. Each project that you plan to use this API from will need to enable it, which is all the more reason to have a centralized Billing Administration project for projects like these.
Get to the code
With all the setup done, the next step is to start coding! We’ll work with a quick Python script here to keep it simple but this could be run from anywhere that makes sense for your setup, such as a Cloud Function that you could call whenever a new project gets created. Since we’re using Python and the client libraries here, we’ll first create a virtualenv and then run:
pip install google-cloud-billing-budgets
Now let’s look at some code!
import osfrom google.cloud.billing import budgetsos.environ["GOOGLE_APPLICATION_CREDENTIALS"] = "billing-admin-serviceaccount.json"BILLING_ACCOUNT = 'billingAccounts/XXXXXX-XXXXXX-XXXXXX'client = budgets.BudgetServiceClient()def list_budgets():all_budgets = client.list_budgets(request = {'parent': BILLING_ACCOUNT})print('Budget summary')print('--------------')for budget in all_budgets:print(f'Name: {budget.display_name}')b_amount = budget.amount;if 'specified_amount' in b_amount:print(f'Specified Amount: {b_amount.specified_amount.units} {b_amount.specified_amount.currency_code}')if 'last_period_amount' in b_amount:print('Dynamic spend (based on last period)')print('')
This part is pretty simple, as all we’re doing is listing out the existing budgets. To break it down a bit further:
import osfrom google.cloud.billing import budgetsos.environ["GOOGLE_APPLICATION_CREDENTIALS"] = "billing-admin-serviceaccount.json"BILLING_ACCOUNT = 'billingAccounts/XXXXXX-XXXXXX-XXXXXX'client = budgets.BudgetServiceClient()
We’ll need to import the budgets resource from the Google Cloud billing client library. We’re also setting the location of the Service Account key manually (though you could skip this if you just set the environment variable outside of the script) as well as setting a variable for the billing account ID. You can find this ID on the billing account page and it should look like three sets of six characters or numbers. Finally, we set up the client so we can make calls.
def list_budgets():all_budgets = client.list_budgets(request = {'parent': BILLING_ACCOUNT})
In the list_budgets function, we’re using the client library to request a list of the budgets and passing in that billing account ID as the parent. Simple enough!
print('Budget summary')print('--------------')for budget in all_budgets:print(f'Name: {budget.display_name}')b_amount = budget.amount;if 'specified_amount' in b_amount:print(f'Specified Amount: {b_amount.specified_amount.units} {b_amount.specified_amount.currency_code}')if 'last_period_amount' in budget.amount:print('Dynamic spend (based on last period)')print('')
Now we’re looping through the results and printing out their display name, along with the budget amount (refer back to this post for more details on how the different amounts work). So, running this function gives us the following:
Budget summary--------------Name: Dev EnvironmentsSpecified Amount: 150 USDName: Last Month TrackingDynamic spend (based on last period)Name: BigQuery BudgetSpecified Amount: 500 USDName: General SpendingSpecified Amount: 1000 USD
This can be a handy way to see our existing budgets and get the details that are relevant. That’s a great starting point but let’s take it a step further.
Create and update
First, let’s create a new budget, which can be useful to automate if you’re doing things like spinning up multiple projects or a whole new environment. Here’s some quick code to do just that!
def create_budget(name: str, amount: int, dynamic_amount: bool = False):new_amount = budgets.BudgetAmount()if dynamic_amount:new_amount.last_period_amount = budgets.LastPeriodAmount()else:new_amount.specified_amount = {'units': amount}new_budget_details = budgets.Budget({'display_name': name,'amount': new_amount,})new_budget = client.create_budget(request = {'parent': BILLING_ACCOUNT, 'budget': new_budget_details})print(f'Created budget: {new_budget.display_name}')
Keeping it simple, this function will take in the name for the budget and the amount, as well as a flag for specified amount versus the dynamic last month amount. So if we call this function with something like this:
create_budget("Dynamically created budget", 100, False)
We’ll see our new budget show up in the console!

Of course, this is a pretty default budget since all we’ve set is the name and an amount. What if we only want to limit this budget to a certain set of projects? Back to the code!
def add_project_to_budget(budget_id: str, new_project: str):modify_budget_id = f'{BILLING_ACCOUNT}/budgets/{budget_id}'modify_budget = Nonetry:modify_budget = client.get_budget(request = {'name': modify_budget_id})except:print('Something bad happened, try checking the budget ID?')returnnew_project_id = f'projects/{new_project}'print(f'Old budget scope: {modify_budget.budget_filter.projects}')modify_budget.budget_filter.projects.append(new_project_id)print(f'New budget scope: {modify_budget.budget_filter.projects}')client.update_budget(request = {'budget': modify_budget})print(f'Budget updated: {modify_budget.display_name}')add_project_to_budget('1f45cd91-641a-48fc-bb66-85d11d19d50d', '254328765116')
This function takes the budget ID (you can find this through the API or the console URL) and the project number you want to add (project IDs are separate from project numbers, but you can find both through the API or console) in order to add that to the scope of the budget. If the budget didn’t have a scope before, this would scope the budget to just a single project. Here’s the output when we run it:
Old budget scope: ['projects/779655805340', 'projects/441897804744']New budget scope: ['projects/779655805340', 'projects/441897804744', 'projects/254328765116']Budget updated: Dynamically created budget

Next steps
Hopefully this code serves as a good starting point for how you can automate your budgets to make sure your budgets can stay updated even if your environments are changing quickly. Check out the client library and the documentation if you want to learn more and automate away!


