Developers & Practitioners
cost optimization.jpg
TL;DR – Rather than wait for budget alert emails, you can use programmatic budget notifications to send budget updates to your favorite comms channels, like Slack (as well as anything else you can code).
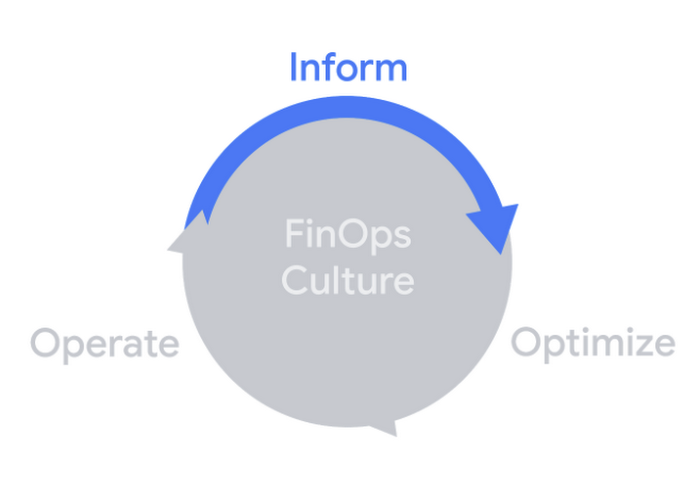
The last post introduced programmatic budget notifications and we saw a simple example of printing out some information. Since we can respond to the budget notification with code, a whole world of possibilities is available including third party integrations.
Slack is a popular communication platform for teams, so it’s an ideal candidate for sending budget information and keeping your team informed of the status of your budgets. In this post, we’ll go over the steps to send your budget notifications to Slack.
Disclaimer: These instructions work at the time of writing, but Slack may change things.
Configuring Slack
Here’s what we’re working towards:
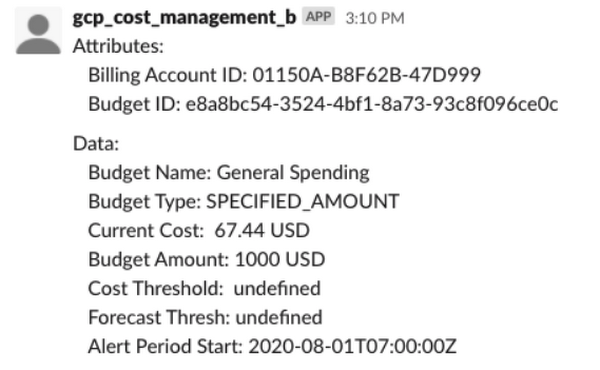
This is a message posted by a bot (gcp_cost_management_bot) that prints out a bunch of the different budget notification details. There’s not too much more to do here than the last post, but first we need to set up a Slack bot.
You’ll need to create a Slack account and workspace (but not a Cloud Monitoring one) if you don’t already have one. I’ll leave that part of the explanation up to them but once you’re done, head over to https://api.slack.com/apps. The first thing you’ll want to do is make a new app.
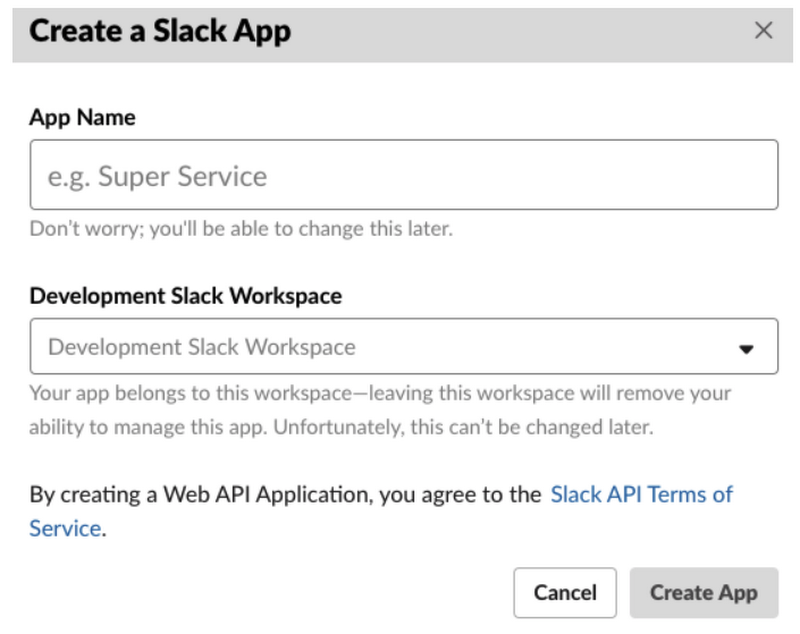
There are a lot of other things you can configure about your bot once you’ve created your app, but there’s two key pieces of information we need to get this working, an OAuth Token and a channel.
To get the OAuth Token, look for the menu option labelled “OAuth & Permissions”. Once you’re there, find the section for Bot Token Scopes and click “Add an OAuth Scope”. The scope needed to send messages is called “chat:write” so type that in and add it.
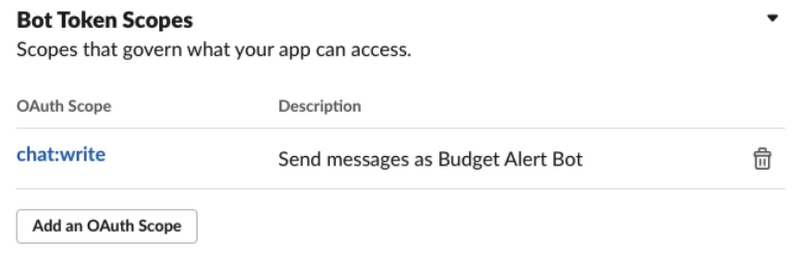
Then, scroll back up and look for “Install App to Workspace”, which will direct you to a permission screen where you authorize the bot to post messages. After you do that, you’ll see an OAuth Access Token that you should copy and write down, since we’ll need it later.
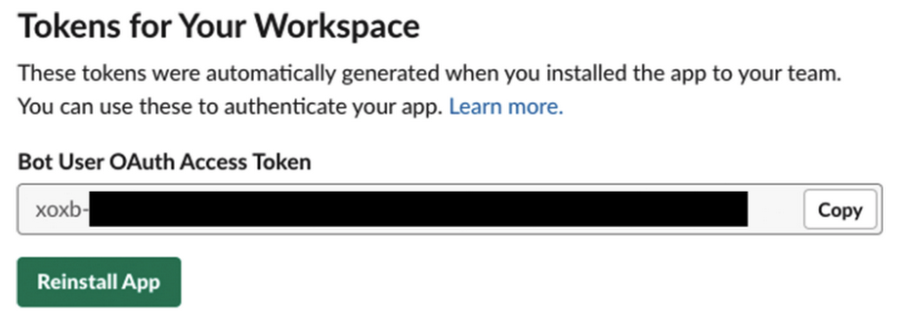
With that safely stored away, the only thing you need is a channel that you want to send messages to. I’ve used a channel called “budget-alerts” (don’t include the #) but I’d suggest using a new channel rather than an existing one at least to start!
Note: You’ll also need to go to your channel and run a command to invite the bot into the channel where you want it to post. You’ll want to update the bot name based on the name you provided.
/invite @budget_alert_bot
Back to the cloud!
Now that we have the token and channel, head back to the Google Cloud Console and create a new Google Cloud Function. If you followed the steps from the last post, you can leave your logger bot or shut it down, since Pub/Sub allows multiple subscribers to a topic. Choose a name like “budget-notification-slack” and make sure to choose the same Pub/Sub topic. If you want a refresher on creating a function, the last post has a bit more information.
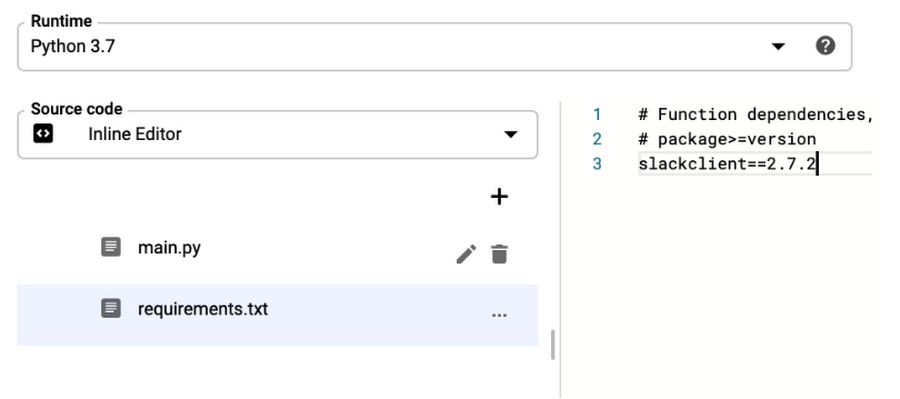
Once again, we’ll use Python 3.7, but this time we’ll change the code. By default, you’ll have two files on the left, main.py and requirements.txt. I won’t go into any Python specifics here but click on requirements.txt and add this line of code:
slackclient==2.7.2
Here’s a picture to make sure everything is good:
import base64import jsonimport osimport slackfrom slack.errors import SlackApiError# See https://api.slack.com/docs/token-types#bot for more infoBOT_ACCESS_TOKEN = 'xxxx-111111111111-abcdefghidklmnopq'CHANNEL = 'C0XXXXXX'slack_client = slack.WebClient(token=BOT_ACCESS_TOKEN)def notify_slack(data, context):pubsub_message = datatry:notification_attr = json.dumps(pubsub_message['attributes'])except KeyError:notification_attr = "No attributes passed in"try:notification_data = base64.b64decode(data['data']).decode('utf-8')except KeyError:notification_data = "No data passed in"budget_notification_text = f'{notification_attr}, {notification_data}'try:slack_client.api_call('chat.postMessage',json={'channel': CHANNEL,'text' : budget_notification_text})except SlackApiError:print('Error posting to Slack')
That’s not too much code, but let’s break down a few important bits:
BOT_ACCESS_TOKEN = 'xxxx-111111111111-abcdefghidklmnopq'CHANNEL = 'C0XXXXXX'slack_client = slack.WebClient(token=BOT_ACCESS_TOKEN)
Note: If you don’t update this part of the code yourself, it won’t work.
Right after the imports, these two lines are the ones you’ll need to update with those values you securely saved before. Both are strings that you need to replace, and it should be pretty clear which value goes where. Note that the CHANNEL variable can be the name of your channel (like “budget-alerts”) or the channel ID (like C0123456789). We also set up the Slack client with the bot access token.
def notify_slack(data, context):pubsub_message = data
This is the start of the function called “notify_slack”, and then we grab the data that was passed in as the message Pub/Sub gets from the budget.
Note: You’ll also need to change the entry point of the function from “hello_pubsub” to “notify_slack” since that’s the actual function we want to be called. If you don’t change the entry point, it won’t work.
try:notification_attr = json.dumps(pubsub_message['attributes'])except KeyError:notification_attr = "No attributes passed in"try:notification_data = base64.b64decode(data['data']).decode('utf-8')except KeyError:notification_data = "No data passed in"
In that previous post, we went over the message Pub/Sub gets from the budget, and what it sends over to the subscribers. Well, it’s a bit more complicated than I explained before (sorry). The full message is actually made up of two parts, attributes and data. You can read the full spec here, but we’re basically just grabbing the attributes (JSON) and data (Base64-encoded) so we can use them for their valuable data.
budget_notification_text = f'{notification_attr}, {notification_data}'
This line simply grabs the values from both the attributes and the data and puts them into a string. Yes, it’ll be messy but it’s just our starting point for now.
slack_client.api_call('chat.postMessage',json={'channel': CHANNEL,'text' : budget_notification_text})
And finally, here’s where we try to post the message to Slack, specifying the channel and the actual message. Pretty straightforward.
So, that’s all the code we need! Make sure to replace the bot token, channel name, and function entry point as described above and deploy that function!

Once the function is up and running, we can move on to testing it!
The proof is in the notification
Similar to when we tested our logger function, we can send a test message using Pub/Sub or just wait for a budget notification. I’m terribly impatient, so let’s send a test message. Head to the Pub/Sub page, click on your topic, and then click publish message. We can use the same test body:
{"budgetDisplayName": "name-of-budget","alertThresholdExceeded": 1.0,"costAmount": 100.01,"costIntervalStart": "2019-01-01T00:00:00Z","budgetAmount": 100.00,"budgetAmountType": "SPECIFIED_AMOUNT","currencyCode": "USD"}
But we can also add some attributes to reflect what a real notification might look like. Two important attributes are the billing account’s ID and the budget’s ID, both of which are unique.
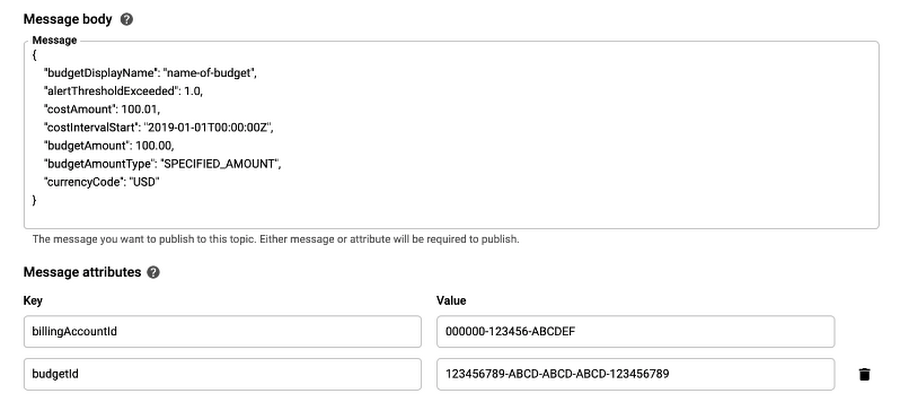
Once you send the message, check your Slack channel and you should see something like this:

Wrapping things up
As you should see, the test message came through and the data was sent into a message from the bot! Of course, if you wait for a while, you’ll also see an actual budget notification message with real data come through and posted to Slack.
You may notice that the bot message doesn’t match the first image way back up at the top (these blog posts sure are long). That’s because you can update the code to do more than just dump out the entire object, you can format a message specific to the data and formatting that makes the most sense for you. This post is long enough so I’ll leave it as an exercise to you! If you want to see more examples, check out the documentation.


